Attacking rook in lateral position
The winning method here is based upon using the rook to cut off the opposing king so that you can force the kings to opposite sides of the board. This often entails giving up one of the pawns and shepherding the other through to queening with your king and rook whilst the defending king is too far away.
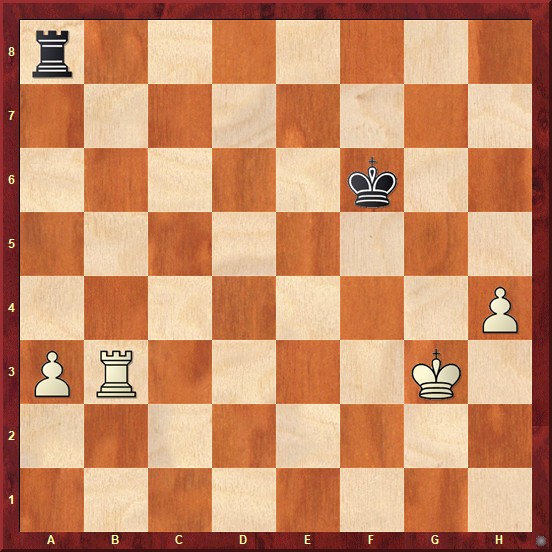
If the pawns are on the same rank this is nearly always won. E.g. all the following positions are won even with Black to move. You can see the winning method played out for the first example here.

![]()
![]()
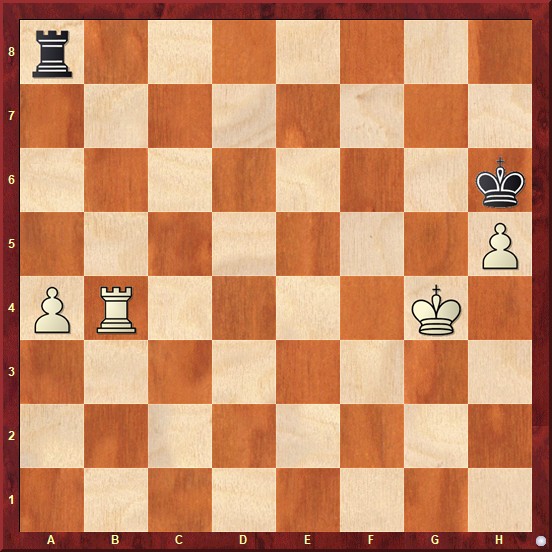
If the pawns are on different ranks it may be won or drawn. If the pawn on the side with the kings is more advanced, it depends on how advanced the pawns are and in some cases the exact position of the defending king (as one tempo can be the difference between a win and a draw).
Drawn with either side to move.
See it played out here.

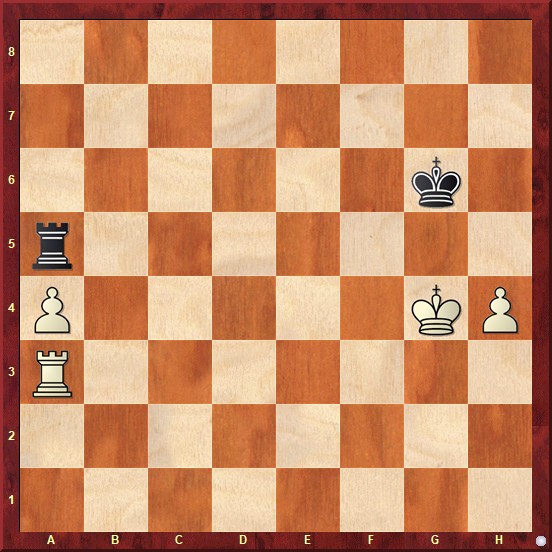
Move everything down by one rank and it is won with either side to move (only just in the case of Black to move).
See it played out here.
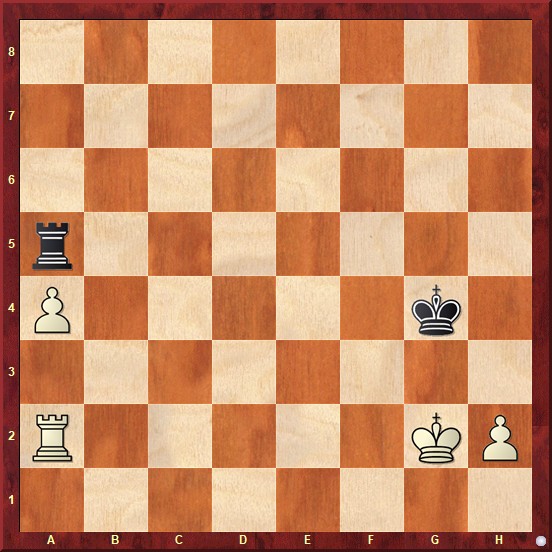
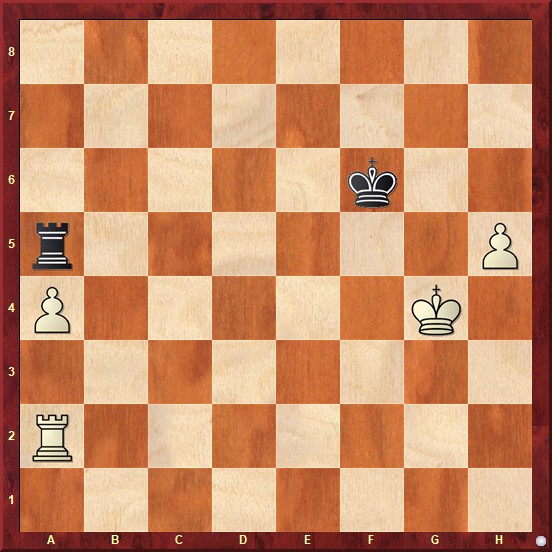
Now improve the position of the black king and it is drawn with Black to move (1....Ra5) but still lost with White to move.
As you can see these are very tricky. I could give more examples but I am not sure it would help. I think it is probably best to just remember the way to try to win and as the defending side the need to get your king to the opposite side having captured the pawn.
On the other hand if the pawn near the kings (i.e. the h-pawn in our cases) is less advanced than the lone pawn, then it is an easy win as White can easily advance it to be level with the lone pawn before forcing the kings apart. So for instance the following is an easy win even with Black to move (1...Ra5 2.h4 etc).

Attacking rook behind the lone pawn
The main winning method here is based upon reaching a favourable lateral position. If the defending side tries to prevent this by quickly mopping up one pawn, then their king ends up too far away from the other.
This is won. See it played out here.
In a similar way to the lateral case, it is OK for the attacking side to have the pawn near the kings less advanced. This position is won.
Having the pawn near the king more advanced than the other pawn hinders the attacker. This is drawn with either side to move
Attacking rook in front of the lone pawn
Before covering this let's briefly consider the case of just one rooks pawn and the attacking rook in front of it. There is a lot of theory on this ending, some of it surprisingly tricky, and much of which I cannot remember. I will cover a few key points and for simplicity I will describe the case with White having an a-pawn. A few general points:
- 1. If the black king is near the pawn (say on the c7) the ending is in general drawn.
- 2. If the black king is far away from the pawn its best squares are g7 and h7 (or g8 and h8) and the ending is then generally drawn.
- 3. The danger zone is when the black king is somewhere in between, say on e7 or too far up the board, say on h4. In these cases the endgame is often won for White.
- 4. In general it is essential for Black on every move to keep attacking the pawn or give check so that the white rook cannot escape from in front of the pawn.
- 5. White's winning attempts often entail putting the pawn on a6 so as to have a7 available for his king as shelter from rear checks.
- 6. As long as his king does not get in the way and his rook is suitably placed, Black's easiest (and sometimes only) defensive method is to use lateral checks. If the White king comes away from the pawn to attack the black rook (to prevent the lateral checks) it is important that Black can attack the pawn immediately to prevent the white rook from escaping from in front of the pawn. Only when the pawn advances to a7 should Black switch to checks from the rear (though lateral checks may also be effective depending on how the pieces are placed).
In the cases we are considering of two rooks pawns and the kings starting on the same side, the positions are generally drawn but require a little care. The key defensive method points are 2, 4 and 6 above.
Let's look at a couple of examples.

With Black to move this is drawn. See it played out here, illustrating the above points.
Note that if it were White to move, it is a win because the white rook can escape from in front of the pawn.
A very similar example with the board flipped. Note that the rook is already attacking the h-pawn so this is drawn with either side to move. See it played out here.